My Stablecoin Strategy
So about a month back, Chris from HoneyMoney SG hosted a community meet up at my cafe, Open Sourced. It was a pretty cosy gathering with people from his community, sharing ideas on miles, points and even how to get high yield savings.

And me, being the crypto person, I’m kinda lost with these miles and points, because I’m more interested in stacking my crypto as I believe that it’s the future of finance. And some questions like what tokens or coins to buy, where to put them etc started coming up and this gave me an idea to maybe do a run down of what I’m doing with my crypto.
I want to break this into a few parts, so it’s easy to understand and if you want to follow along, it won’t be too complicated as well. I’ll break them into wallets to hold your crypto, exchanges buy and sell and decentralized protocols to put them to earn. I’ll also leave the timestamps in the description so you can easily jump to whichever section interests you.
Types of Crypto Wallets
Let’s talk about wallets. There are 2 main types of wallet available out there in the market. There’s software wallets, which are usually free to use, and there’s hardware wallet, which are paid options because you receive the hardware. So I got a few hardware wallets, because I’m an idiot that got hacked, hence my colleagues decided to buy me one as a gift.
The one that I use the most is my Tangem wallet. It comes in a card format and you can purchase either a 2 card or 3 card pack. Like the name suggest, a 2 card pack gives you 2 cards and the 3 card pack gives you 3 cards. If you are looking to get a card, using my promo code: G9HYA2 give you a 10% discount!

When you set up the wallet, it doesn’t require you to have your seedphrase, and all you need is your phone and card to unlock your wallet for spending. And the difference between 2 or 3 cards is basically how many backups you have in the event you lose your cards. I went with the 3 card option and have my cards kept in different places so I can access them if I ever lose them
And using it really simple, you can connect via WalletConnect, which is a way of connecting your wallet to an application or website.
Then we got Ledger and Trezor. Both require USB connection to your laptop, pc or phone to unlock the wallet. But in the modern version or latest version, I believe most have bluetooth connectivity. Ledger and Trezor is a little more complex, because it requires users to write down seedphrases and store them securely.

Don’t be the idiot that tells people where your keys are, otherwise they will have access to your wallet. If you’re looking for wallets, I have left links down in the description, where you get some discount for your purchase. If paying for a wallet is not something you want to do because you are new. Then there’s the option of software wallet or wallets that you can download as an app on your phone or in your chrome extension.
The most popular option here is MetaMask, which is considered the OG in the crypto space. But there are also other options like Okx wallet, Rabby wallet and more which might be easier for beginners.
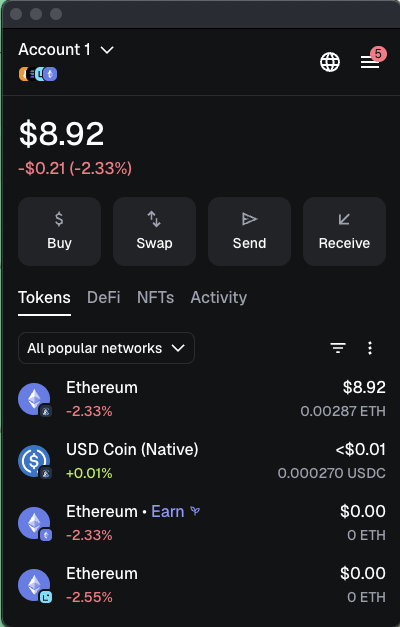
So we covered the wallets and at this point, it doesn’t really matter which wallet you use or even if you choose to use one or not. Because exchanges these days can provide you with a wallet that allows you to go into part 3 where we earn some crypto. The one I like to use is OKX and unfortunately, I’m not sponsored, but if you appreciate content like this, please share it, so OKX can sponsor me someday, hopefully. But nonetheless, I’ll just use OKX as an example because it’s something I use and easy for me to share my experience.
Once you download OKX, it will ask you to sign up and complete KYC. Which basically means you need to complete verification because they want to ensure that your funds are clean and not coming from some random wallet or worst still a hacker’s wallet. Once KYC is cleared, you will see that OKX has a few features that are pretty cool. Like the feature that allows you to deposit SGD to purchase crypto, very important. But also it allows you to do the reverse of selling crypto into SGD. which 99.9% of merchants in Singapore use when selling a service or product to you.
To do it, really simple, click deposit and it shows you a whole list of tokens and coins you deposit. Here you can choose SGD and complete the transaction via paynow. Super easy. Once your deposit is confirmed, we can start buying crypto. But at this point, you can literally trade any crypto of your choice and there are many different trading pairs available for you to choose from.
For this case, I’m buying USDC because I want to earn USDC, a Stablecoin pegged to the US dollar. And I treat this like my high yield savings account because I can get yields between 7-11% APY, which is really decent and something that I can’t complain about.
Now we are at the last section, which is the protocol to use. In your OKX app, at the top of the screen, there’s a Exchange dropdown, we will select ‘web3’ which will take us into the decentralized world. In the decentralized world, there are many different protocol or websites that provide you with opportunities to earn yield. But being decentalized, this also means that there are not governing bodies looking after these. So do some research before putting your money into any of these protocols.
The one that I use the most is dolomite. It’s a lending and borrowing platform, think of it like a bank. We put USDC in, that USDC is borrowed by someone else and we get interest for lending out USDC. A very simple idea, which is something I like.
We would want to bookmark the site so we ensure that we always go back to the same website and not some phishing site where we might lose our money.
There are a few concepts here to understand, and I’ll use my workflow as an example. So when we transfer money, we need to pay some transaction fee. This is called ‘gas’. And depending on the network you use, the ‘gas’ can be different tokens, but more often than not, the ‘gas’ token is usually Ethereum.
So I use the Arbitrium network alot, because it’s cheap and fast, and the gas is in eth. So with our SGD, we need to buy some ETH and then convert the rest into USDC. You would want to hold some eth so you can do a few transactions if you start enjoying the decentralized world.
So now I got some eth and USDC, and what we do here is to transfer them to our wallet. So the very important thing here is to note that we are using the right network. Think of networks as highways, you want to use the right highway to get to the right location.
I’ll go to the web3 wallet and click on receive, then select USDC, then select Arbitrium. This will give me a QR code together with an address at the bottom. Click on copy to save that address.
Then we head back to ‘Exchange’, and click on portfolio, withdraw and we’ll paste the address in. Over here, ensure that the right network is selected. In this case it’s arbitrium. Once that is done, we should do a test send, to send a small amount of USDC over. If you receive the USDC you send, then we do the same for Eth, which is the gas fee that we need. And when all of whatever you wanne transfer is in, we’ll head to dolomite to deposit into a vault.
Like mentioned, dolomite acts like a bank where you deposit USDC and they lend it out, charging an interest. They take a cut and give the rest back to you. Since it’s a lending and borrowing protocol, the interest fluctuates based on supply and demand. So there are times you get more interest and there are times you get less.
I have been using this for a while with another account and it seems like the interest tends to stay between 7-12% but there are occasions when it really spikes up because of some campaign or marketing initiative that’s happening. Like now, there’s a campaign with Arbitrium, where you get additional Arbitrium tokens. Personally, I treat those as bonuses but for my USDC, we still get about 8% which is pretty decent for me.
Exit Strategy
And the exit strategy here is when you require some cash or FIAT, what you need to do is withdraw and unwind the transaction. So you’ll go to the exchange, tap on deposit, get the address for USDC on Arbitrium, copy that. Go to Web3 Wallet, withdraw, once the USDC is in your wallet, send a small amount as a test.
Once the test is through, send the rest and sell USDC for SGD.
So this is one of the few lending protocols I’m using. If you enjoy this one, let me know by dropping a comment and a like, so i can figure if we should look at other protocols as well. And as always, I hope you guys stay safe, invest safe and I’ll see you in the next one!